Answer
Import Time & Attendance (CSV/JSON)
The Import Time & Attendance wizard is an advanced import tool designed for payroll administrators and third-party software developers who want to integrate external time and attendance systems with Lightning Payroll. If you are using another app that can generate an export file, this wizard lets you upload that data and create pays quickly within Lightning Payroll.
For most customers, simpler options may be a better fit, such as the Lightning Payroll mobile timeclock app or employee-entered timesheets via the Employee Portal on our website.
This wizard is available in both the desktop app (Windows and macOS) and the web and mobile versions of Lightning Payroll.
How To Access The Wizard
In the desktop app: go to Pays and click Import/Manage Time And Attendance Data, or open Rosters and click Import/Manage Time And Attendance Data. The desktop wizard will first ask you to choose a source format: Lightning Payroll (Web App CSV/JSON Format) to use the same CSV/JSON format as the online app, or BundyPlus to import a BundyPlus CSV export.
In the online (web/mobile) app: go to Pays >> Timeclock/Portal Sync >> Import Pay Data (CSV/JSON).
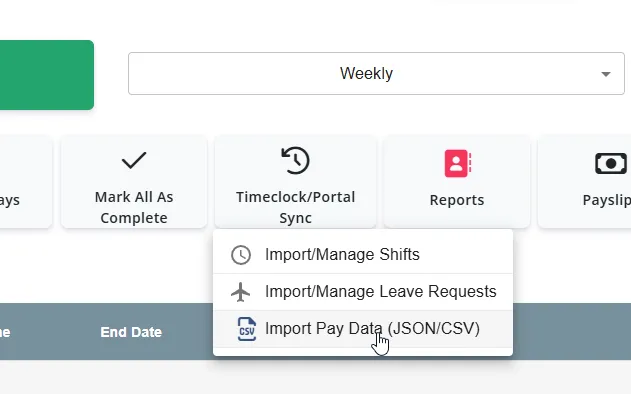
Once opened, you will be taken to the main import wizard screen where you can choose your settings and upload (or paste) your data.
You can import either JSON (Full) for the complete PayCreate model, or CSV (Basic) for hours, leave, and allowances only. The wizard validates your file, shows a preview, and then creates pays.
Before You Start
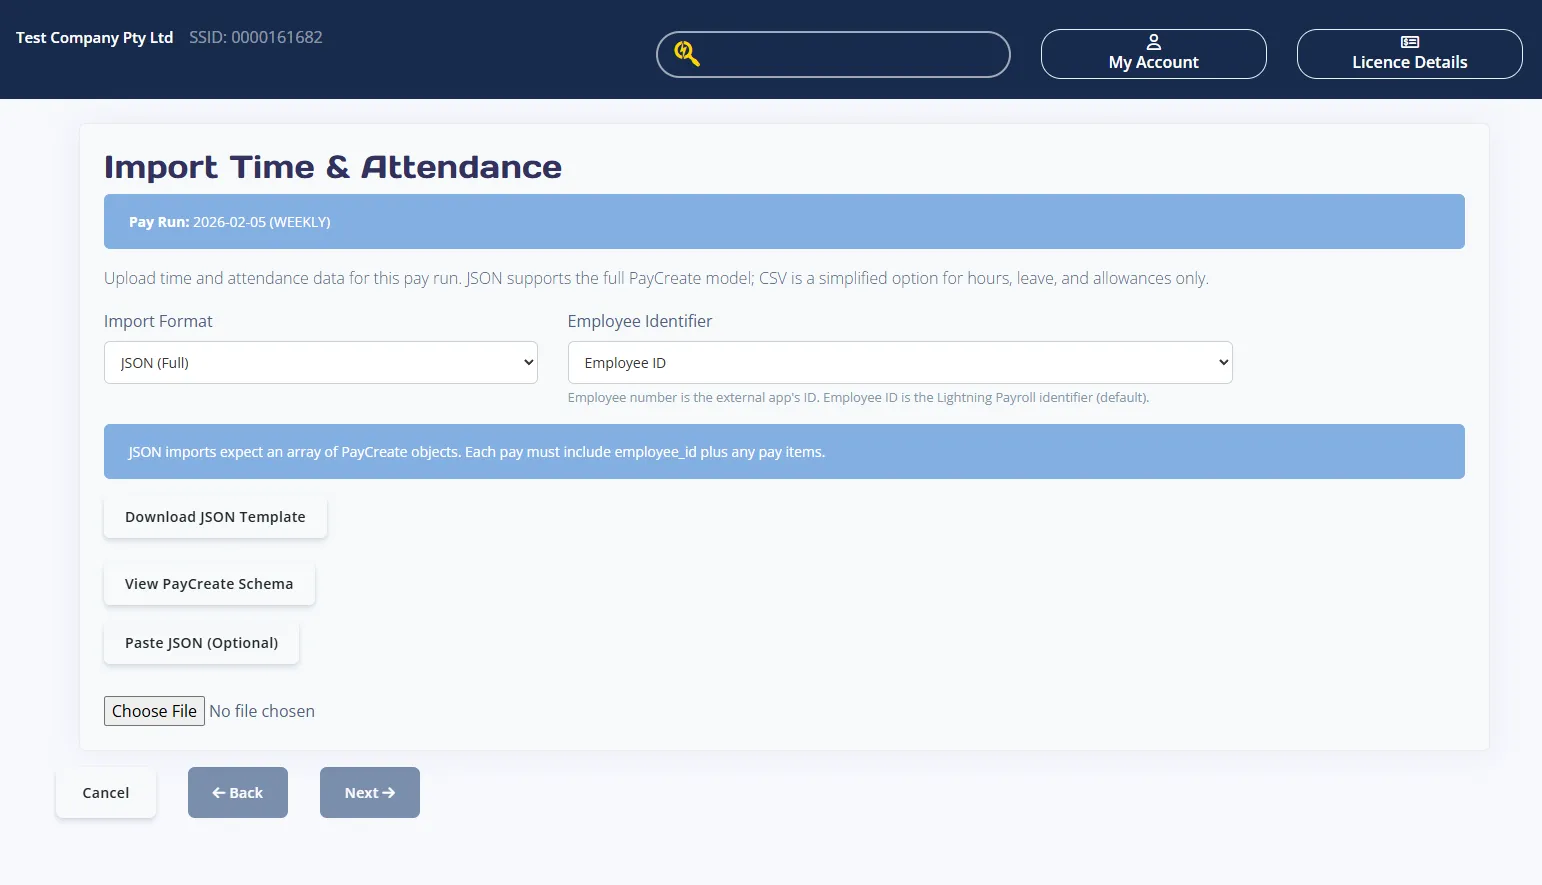
At the top of the wizard you will see the Pay Run date and pay period. This confirms which pay run your import will be applied to. Make sure your file matches this pay run before continuing.
Step 1: Choose Your Import Settings
- Import Format
- JSON (Full) uses the full PayCreate model and supports all pay items.
- CSV (Basic) supports hours, leave, and allowances only.
- Employee Identifier
- Employee Number is the external app identifier.
- Employee ID is the Lightning Payroll identifier.
- Default Pay Department (optional, CSV only)
- Leave blank to use the department in each CSV row.
- If filled in, it will be used as the default for CSV rows without a department.
Step 2: Get Or Create Your File
Use Download JSON Template or Download CSV Template to get a sample file. Save the file anywhere on your computer and then upload it using the Upload JSON or Upload CSV button.
Optional: Paste JSON Instead Of Uploading
If you are using JSON, you can click Paste JSON (Optional) to paste your JSON array directly into the wizard. When text is present, click Next to validate and preview the data.
Optional: View The PayCreate Schema (JSON Only)
Click View PayCreate Schema to load the JSON schema used by the importer. You can copy the schema using the Copy button. This is helpful when you are building your own JSON file and need to confirm valid fields and structure.
JSON (Full) Requirements
- The root structure must be a JSON array.
- Each item in the array must be a PayCreate object.
- Each item must include the selected identifier field: employee_id or employee_number.
- Pay items can include hours, leave, allowances, deductions, bonuses, pay sacrifices, and back payments (see schema below).
Example JSON Payload
This example shows a JSON array with multiple employees and a mix of pay items:
[
  {
    "employee_id": 1234,
    "pay_department": "Engineering",
    "hours": [
      {
        "description": "Ordinary Time",
        "rate": 30.0,
        "units": "hours",
        "is_overtime": false,
        "value": 37.5
      },
      {
        "description": "Saturday Overtime",
        "multiplier": 1.5,
        "units": "hours",
        "is_overtime": true,
        "value": 5.0
      }
    ],
    "leave": [
      {
        "description": "Annual Leave",
        "leave_type": "HOLIDAY",
        "multiplier": 1.0,
        "date": "2026-02-02",
        "hours": 7.6,
        "leave_loading_amount": 3.8
      }
    ],
    "allowances": [
      {
        "description": "Tool Allowance",
        "amount": 50.0,
        "allowance_category": "TD"
      }
    ],
    "deductions": [
      {
        "description": "Union Fees",
        "amount": 25.0,
        "classification": "UNION_FEES"
      }
    ]
  },
  {
    "employee_number": "EMP001",
    "hours": [
      {
        "description": "Ordinary Time",
        "rate": 32.5,
        "units": "hours",
        "is_overtime": false,
        "value": 38.0
      }
    ],
    "allowances": [
      {
        "description": "Car Allowance",
        "amount": 200.0,
        "allowance_category": "RD",
        "is_taxable": true,
        "is_itemised": true,
        "is_included_in_super_calculations": false
      }
    ],
    "bonuses": [
      {
        "description": "Performance Bonus",
        "amount": 500.0,
        "tax_method": "NORMAL_EARNINGS"
      }
    ],
    "pay_sacrifices": [
      {
        "description": "Car Salary Sacrifice",
        "amount": 300.0,
        "is_included_in_super_calculations": false,
        "is_super": true
      }
    ],
    "back_payments": [
      {
        "description": "Back Pay Adjustment",
        "amount": 200.0,
        "stp_category": "GROSS",
        "tax_method": "NORMAL_EARNINGS",
        "start_date": "2026-01-01",
        "end_date": "2026-01-31"
      }
    ]
  }
]
CSV (Basic) Requirements
CSV imports support hours, leave, and allowances only. The CSV must include the following columns:
- employee_id or employee_number
- item_type
- description
- units
- rate
- multiplier
- value
- is_overtime
- leave_type
- date
- leave_loading_amount
- pay_department
- amount
- allowance_category
CSV rules by item_type:
- hours
- Required: rate or multiplier, and value.
- units is optional and defaults to hours.
- is_overtime should be true or false.
- leave
- Required: leave_type, value, and date in YYYY-MM-DD format.
- rate is optional, or provide a multiplier which defaults to the employee's pay rate.
- leave_loading_amount is optional.
- allowance
- Required: amount and allowance_category.
Step 3: Upload And Preview
After uploading or pasting data, click Next. The wizard will validate your file and show a preview. If there are issues, the wizard will list row errors and you will need to fix your file and re-upload.
Review Screen Details
- Rows parsed show each import line.
- Skipped rows indicate blank lines that were ignored.
- Errors appear if any rows failed validation.
- Import preview includes row and employee details plus totals where available.
Step 4: Finish The Import
If no issues are detected, click Finish to create pays. The wizard will confirm how many pays were imported and then return you to the pays list.
PayCreate JSON Schema
{
  "title": "PayCreate",
  "type": "object",
  "properties": {
    "employee_id": {
      "title": "Employee Id",
      "description": "The internal Lightning Payroll (LP) unique ID for the employee. Use this if `identifier_type=employee_id`.",
      "example": 1234,
      "type": "integer"
    },
    "employee_number": {
      "title": "Employee Number",
      "description": "The external user-controlled employee number. Required only if `identifier_type=employee_number`. Must be unique across ALL companies.",
      "example": "EMP001",
      "minLength": 0,
      "maxLength": 32,
      "type": "string"
    },
    "hours": {
      "title": "Hours",
      "description": "Optional list of pay hour items (may be empty), including description, rate/multiplier, units, overtime status, and value.",
      "type": "array",
      "items": {
        "$ref": "#/definitions/PayHours"
      }
    },
    "leave": {
      "title": "Leave",
      "description": "Optional list of leave items (may be empty).",
      "type": "array",
      "items": {
        "$ref": "#/definitions/Leave"
      }
    },
    "pay_department": {
      "title": "Pay Department",
      "description": "Department/Cost-centre name or code to be applied to all items in this entire pay.",
      "type": "string"
    },
    "allowances": {
      "title": "Allowances",
      "type": "array",
      "items": {
        "$ref": "#/definitions/PayAllowance"
      }
    },
    "deductions": {
      "title": "Deductions",
      "type": "array",
      "items": {
        "$ref": "#/definitions/PayDeduction"
      }
    },
    "bonuses": {
      "title": "Bonuses",
      "type": "array",
      "items": {
        "$ref": "#/definitions/PayBonus"
      }
    },
    "pay_sacrifices": {
      "title": "Pay Sacrifices",
      "type": "array",
      "items": {
        "$ref": "#/definitions/PaySacrifice"
      }
    },
    "back_payments": {
      "title": "Back Payments",
      "type": "array",
      "items": {
        "$ref": "#/definitions/BackPayments"
      }
    }
  }
}
