Answer
Xero integration requires the Accounting Integration Add-On. From 1 January 2026, any subscription purchased or renewed on or after that date requires this add-on to use Xero and MYOB AccountRight integration features. See What Is the Accounting Integration Add-On? for pricing and details.
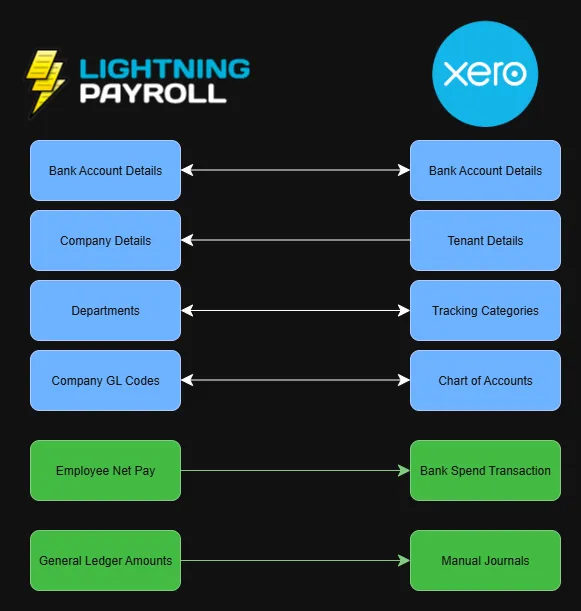
What Data Is Transmitted?
Below is a diagram to show how data flows between Lightning Payroll and Xero.
Submitting A Pay Run To Xero
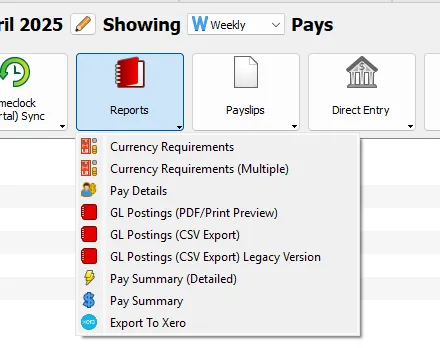
To submit a pay run to Xero, go to the Pays screen, then click on the red Reports book button and select Export To Xero.
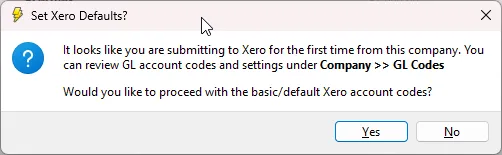
If this is your first time submitting, you'll see a popup asking if you want to use the default Xero account codes from the standard Xero chart of accounts.
Understanding Xero Account Codes
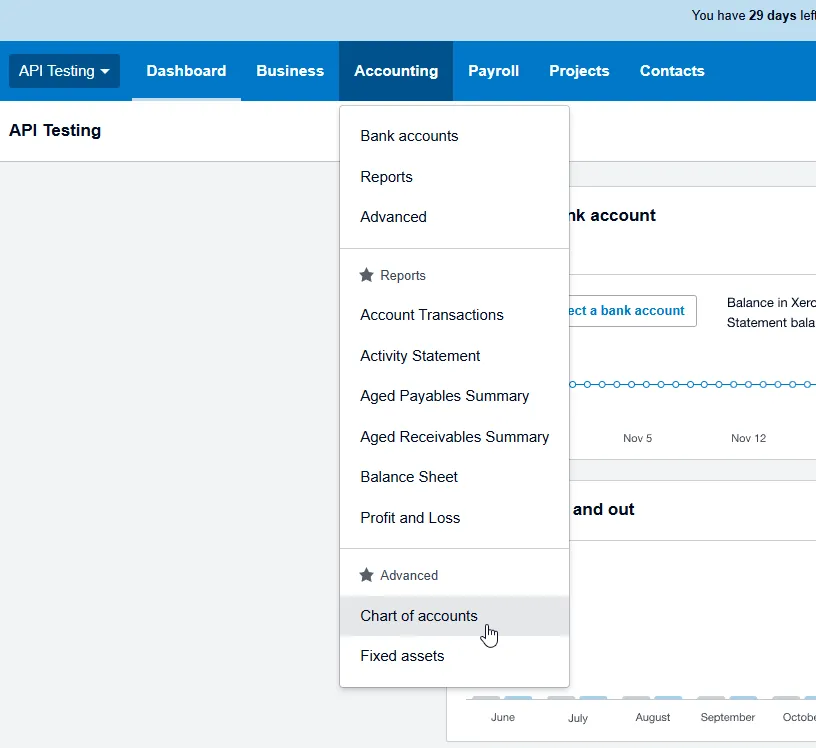
You can view your Xero account codes in Xero by going to Accounting >> Chart of accounts.
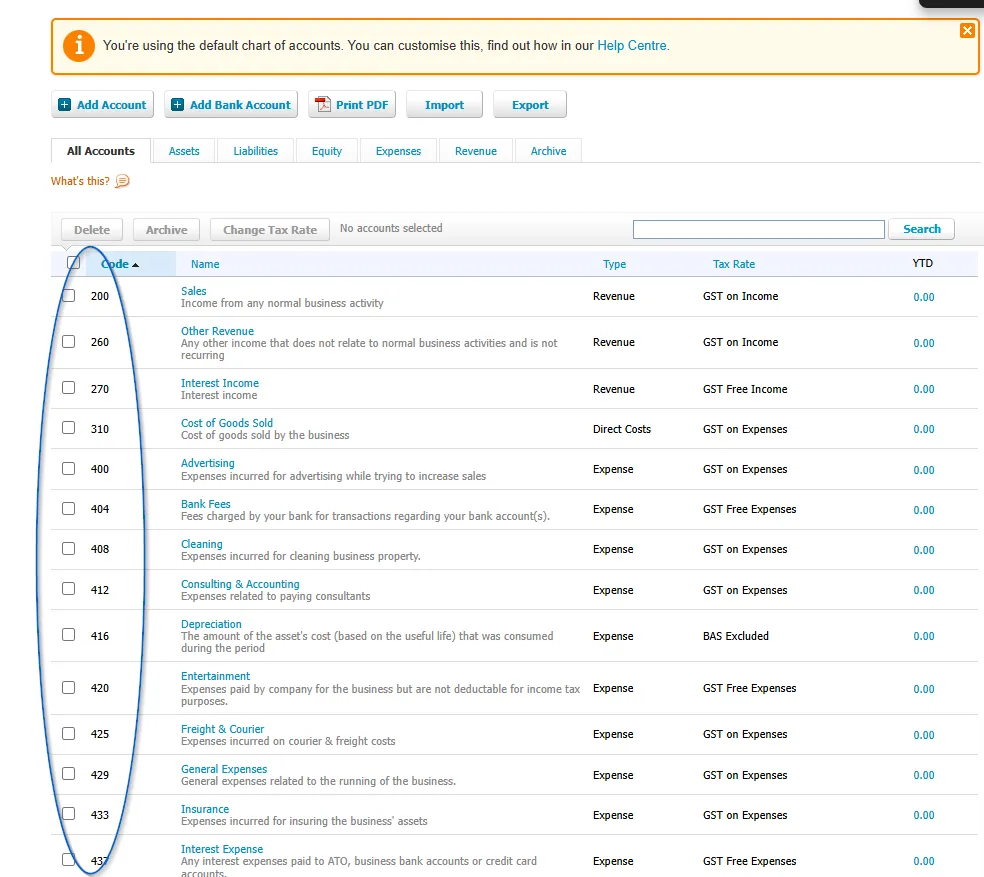
Note: The Xero interface may change at any time at their discretion. These images are provided as an example only and may not exactly match what you see.
If you prefer to use your own custom account codes instead of the defaults, you will need to gather them from Xero's Chart of Accounts screen and manually enter them into Lightning Payroll under Company >> GL Codes. In this section you can use the buttons to Restore Lightning Payroll Defaults or Restore Xero Defaults.
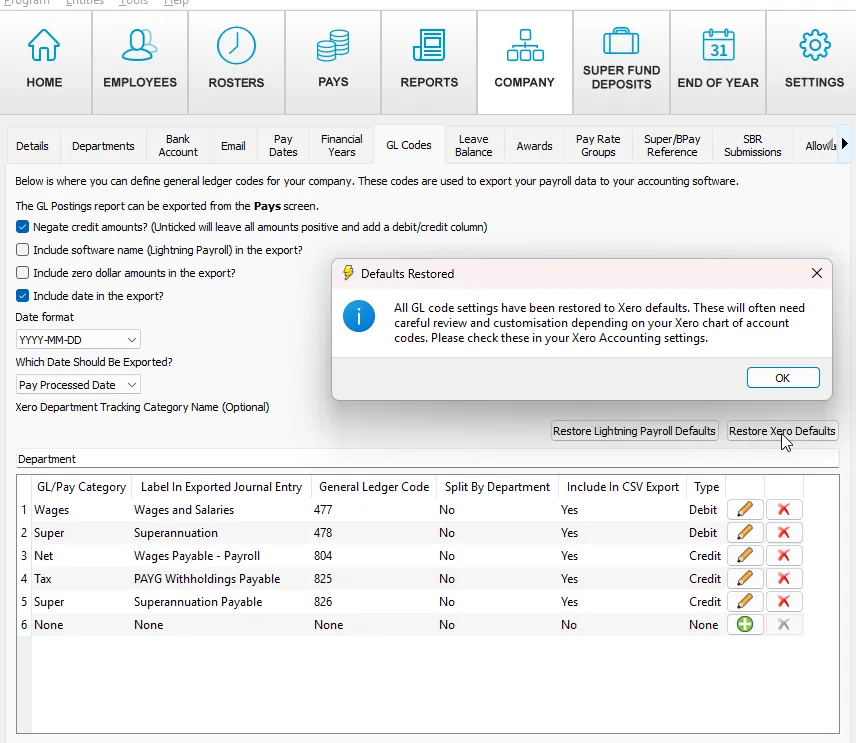
Learn more about editing GL codes in Lightning Payroll here.
Logging In To Xero
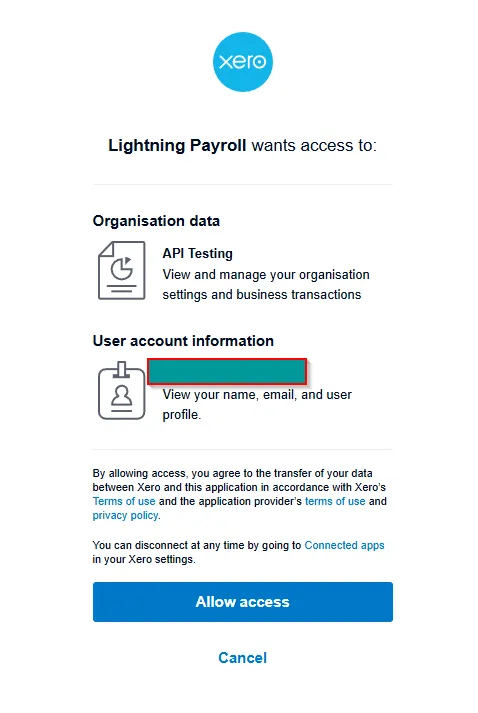
Once your account codes are ready (either default or custom), your browser will launch and prompt you to log in to Xero. After logging in, authorise Lightning Payroll to access your organisation by clicking Allow Access.
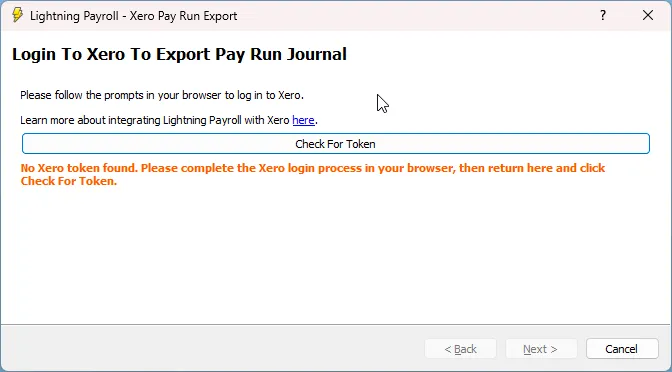
Checking For The Xero Token
After authorisation, a message should confirm that the authentication token has been downloaded. Return to Lightning Payroll and click Check For Token.
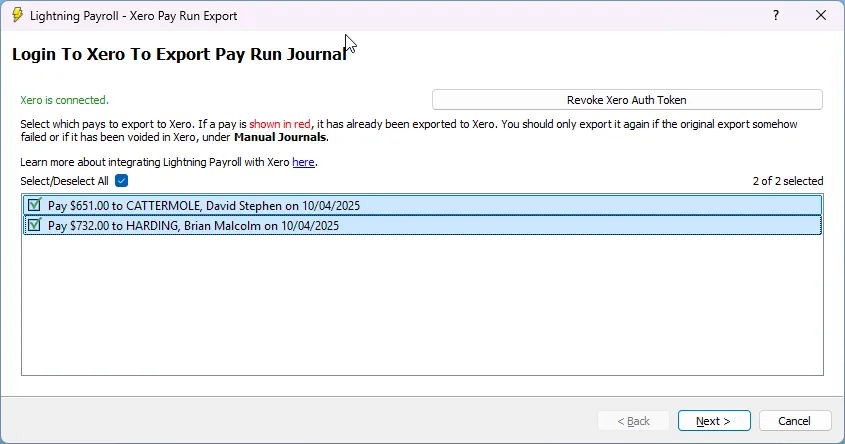
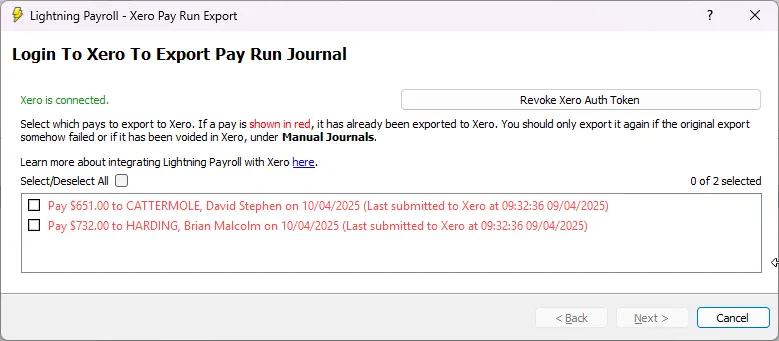
Selecting Pays To Submit
Next, you'll be able to select which pays to submit. Pays that have already been submitted will appear in red (see further down for resubmission info).
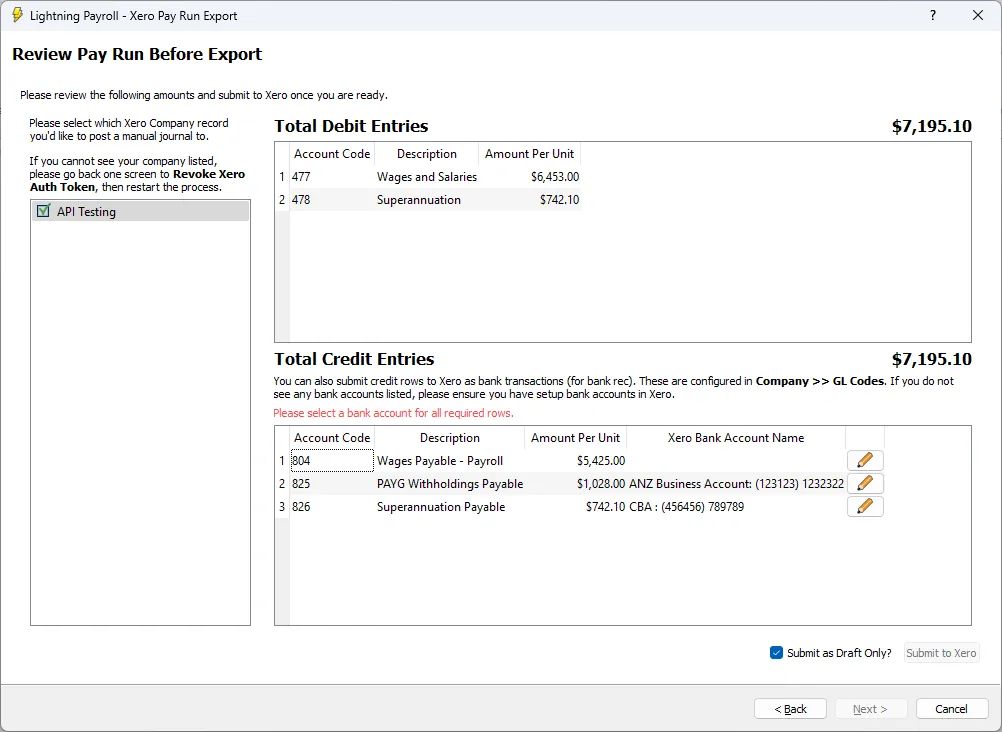
Reviewing The Journal
On the next screen you can review the journal entry totals. There's an option to submit as a Draft Only so things can be reviewed before final posting in Xero.
Important Note on Reimbursements: Employee reimbursements should not be entered in Lightning Payroll, as doing so can cause journals not to balance in Xero. Reimbursements are best handled outside of payroll, for example with a direct bank transfer. If you want the reimbursement mentioned on an employee's payslip without altering payroll or journal figures, you can add a payslip note instead. See our FAQ here for more details.
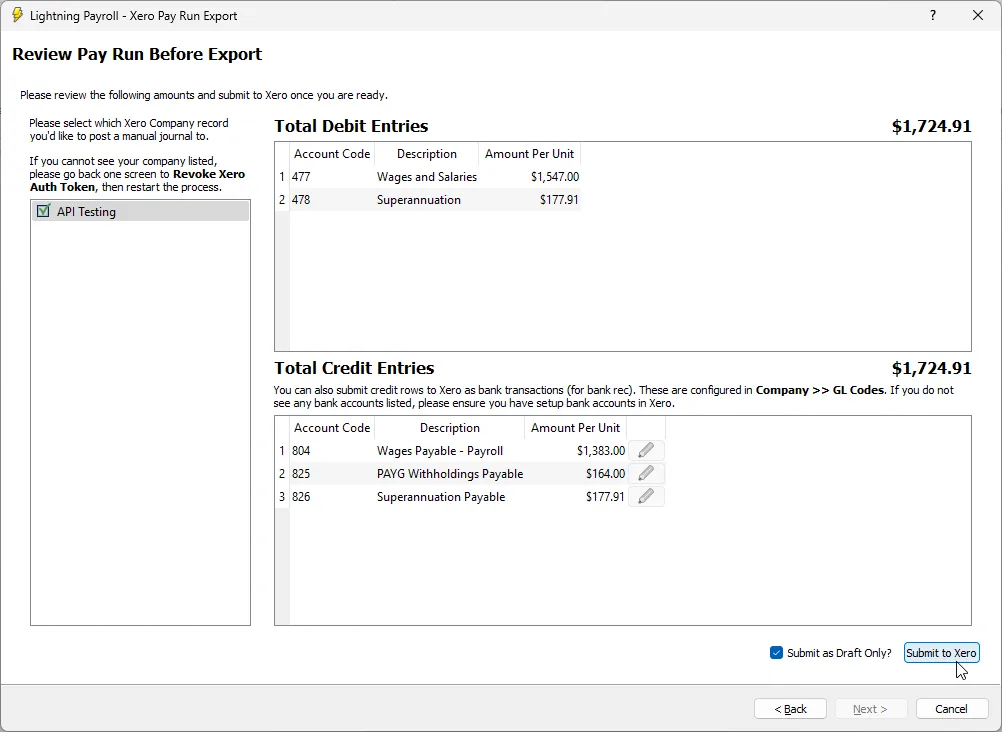
Final Submission
Click Submit to Xero when you're ready. If there are errors or warnings, a popup will display them. If successful, you'll see Xero journal submitted successfully.
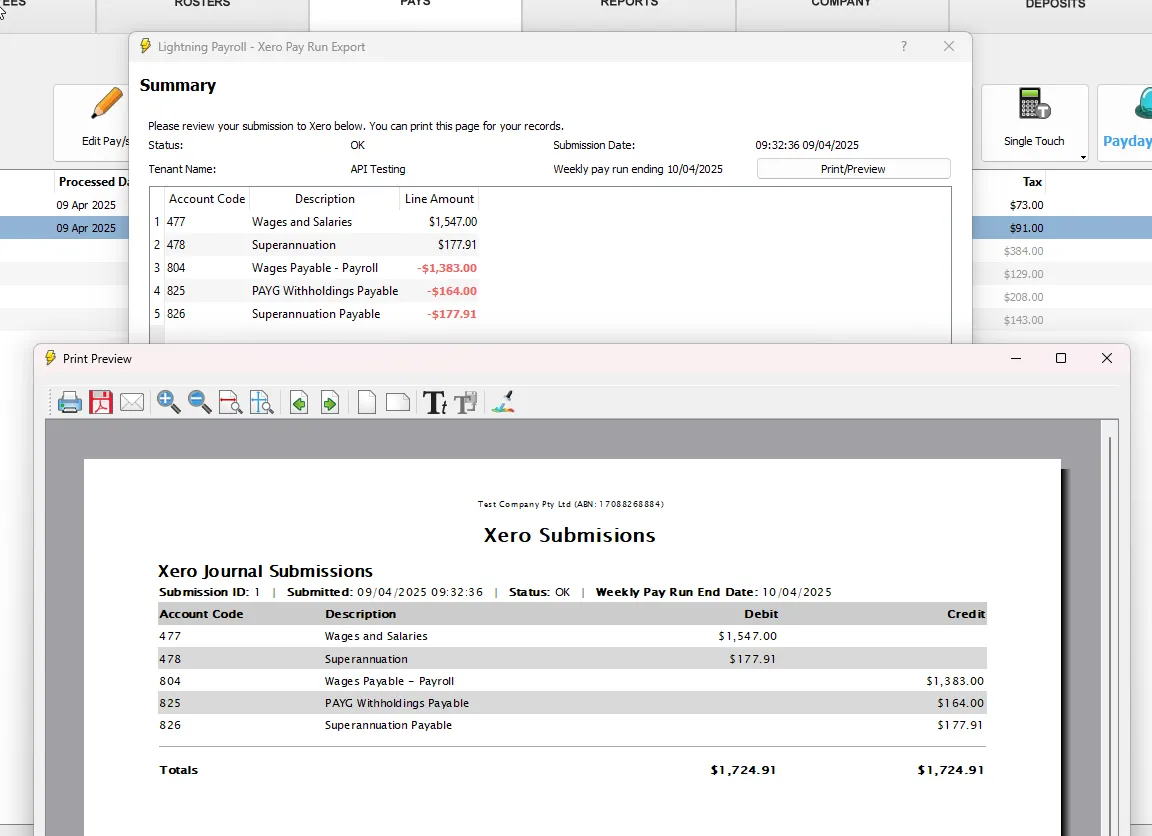
The final screen provides a summary and lets you print or preview the submission.
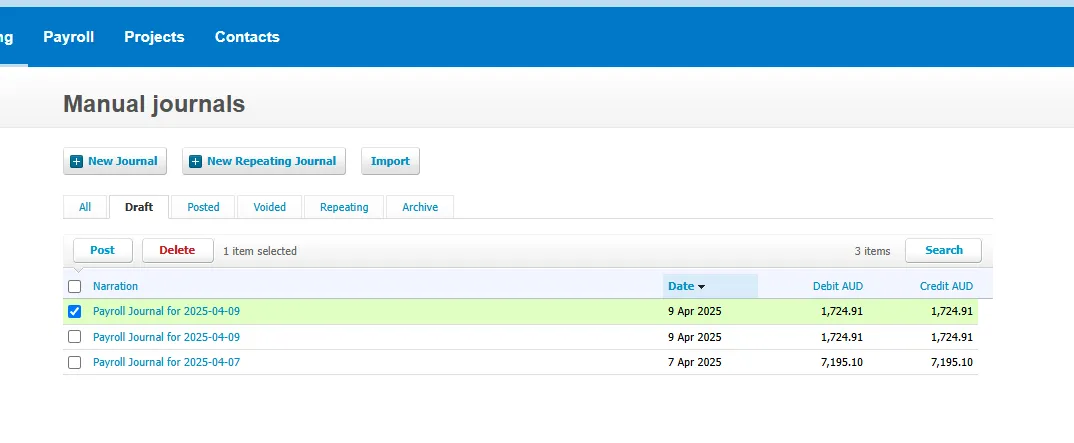
Approving A Draft Journal In Xero
To approve a draft journal in Xero, go to Accounting >> Reports >> Journal Report and click Go to manual journals. Open the Draft tab.
Correcting A Mistake
If you submitted pays by mistake and then made changes, you can resubmit. These pays will appear in red on the pay selection screen.
Corrections must also be made in Xero by voiding the incorrect journal entry. Go to Accounting >> Reports >> Journal Report and click Go to manual journals to locate and void the entry.
Departmental/Cost Centre Breakdown
You can submit more detailed journal entries by breaking figures into departments or cost centres. This is done in Lightning Payroll under Company >> GL Codes. Tick Split By Department (When Applicable) next to relevant ledger items.
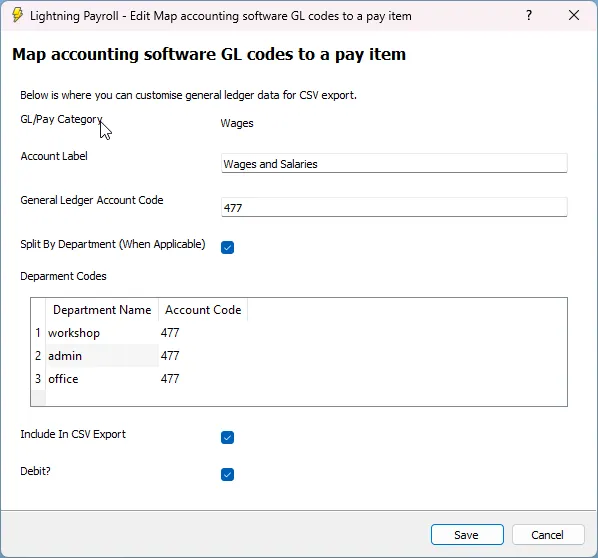
In the above example, departments like 'workshop', 'admin' and 'office' are used. If these don't exist in Xero, you'll see a warning like this:
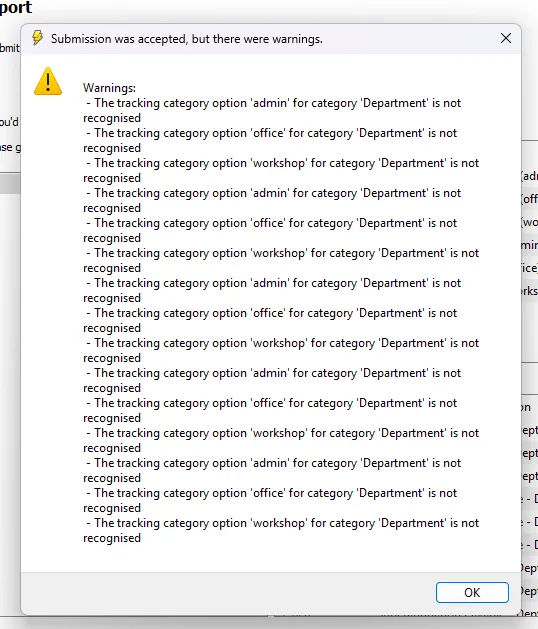
Warnings will not prevent submission. However, if you want departments tracked in Xero, ensure your Lightning Payroll departments match Xero Tracking Categories.
![]()
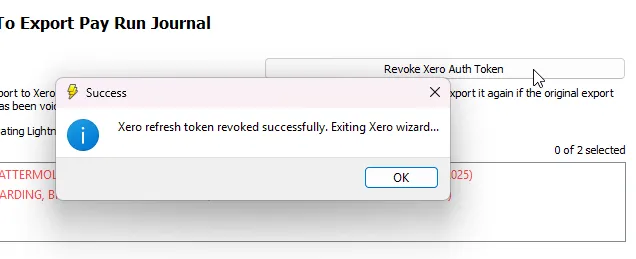
Revoking Xero Access
If you wish to disconnect Lightning Payroll from a Xero organisation, you can revoke access. Go to Pays >> Reports >> Export to Xero and click Revoke Xero Auth Token.
This will remove the connection and, if needed later, you'll need to go through the login and authorisation process again to reconnect to that Xero tenant/company.
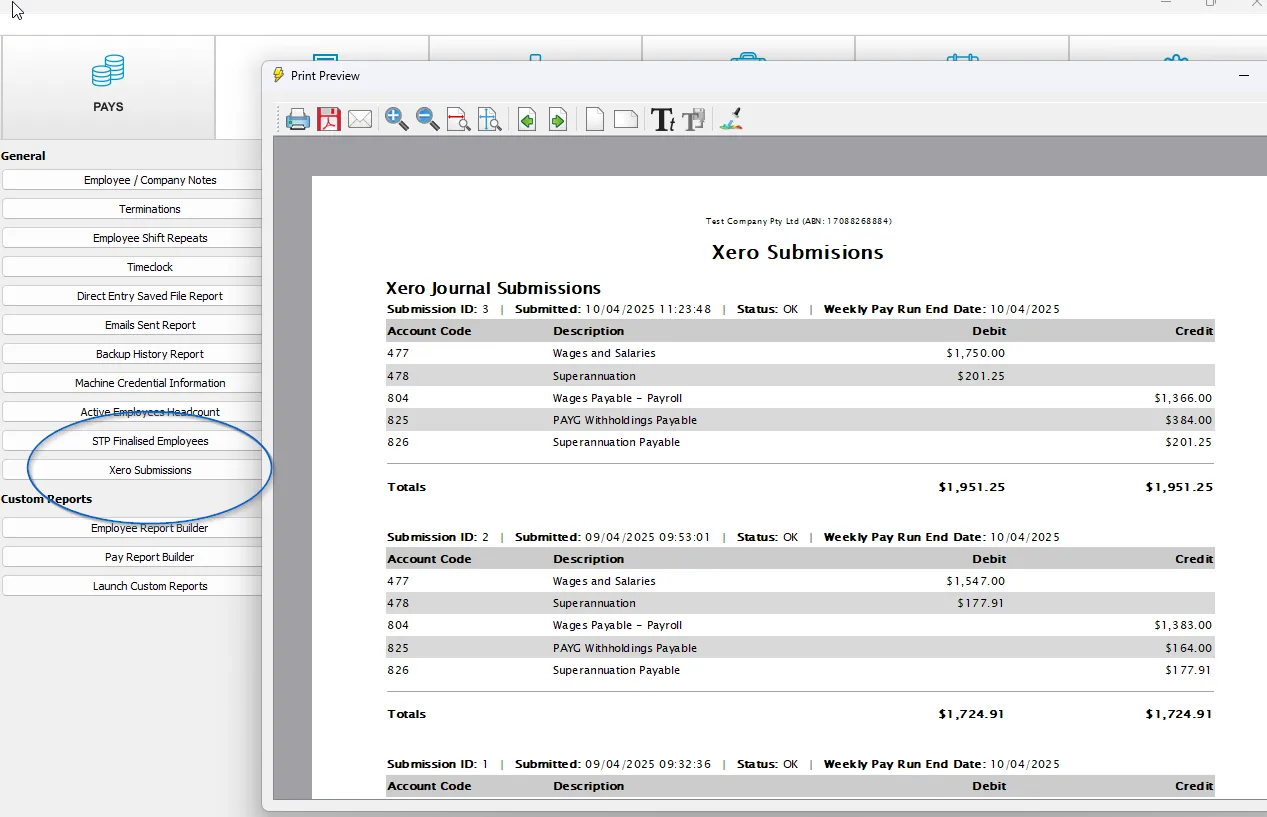
Reviewing Xero Lodgement History
To review previous Xero submissions, go to the main Reports screen and open the Xero Submissions report.
Use the date filters to search through past lodgements and review the status of each export.
Using Xero Integration in Direct Entry Wizards
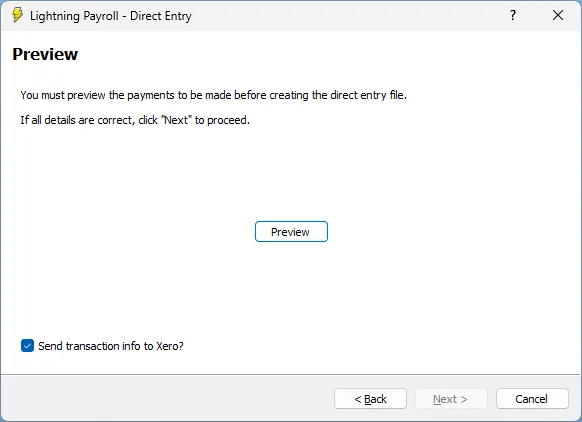
Lightning Payroll includes Xero integration within the Direct Entry Wizards for both pays (ABA files) and SuperStream payments.
After completing the direct entry process, on the Preview screen, you can tick the box to also send the transactions to Xero. Once selected, an additional Xero Submission screen will appear.
This screen allows you to submit each individual transaction - whether it's an employee wage or a super fund contribution - directly to Xero via their Bank Transaction API. This can assist with reconciliation, providing more visibility over outbound payments in Xero.
During submission, Lightning Payroll will attempt to match each transaction to a bank account in Xero using the bank accounts configured under Company >> Bank Accounts in Lightning Payroll. It is important that your bank account names and details match those in Xero to avoid submission errors.
If a matching Xero bank account cannot be found, you will be prompted to either choose a valid account from a dropdown list or correct the mismatch before proceeding.

Note: This functionality supports both ABA and SuperStream direct entry wizards. It provides an easy way to keep your banking and payroll systems aligned with Xero's reconciliation tools.
This feature requires the Accounting Integration Add-On. See What Is the Accounting Integration Add-On? for details.
Sending Bank Transactions To Xero (During Journal Export)
By default, manual journal entries submitted to Xero do not appear in bank reconciliation. If you would like certain totals (such as net pay, tax, or super amounts) to also appear as bank transactions in Xero, you can enable this in Lightning Payroll, although we recommend the more detailed bank transaction export handled via the Direct Entry Wizards (mentioned above).
To do so, go to Company >> GL Codes, find the relevant credit entries, and tick the box labelled Send To Bank Transactions.
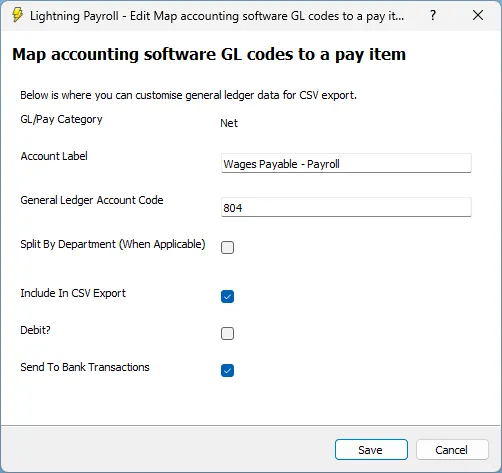
If any credit entries are marked to be sent as bank transactions, they must be linked to a bank account that exists in both Xero and Lightning Payroll. Bank accounts in Lightning Payroll are managed under Company >> Bank Accounts, and you can specify separate accounts for super and pays.
During submission, Lightning Payroll will automatically attempt to match your accounts with those in Xero. If a match is found, it will be used for the bank transaction.
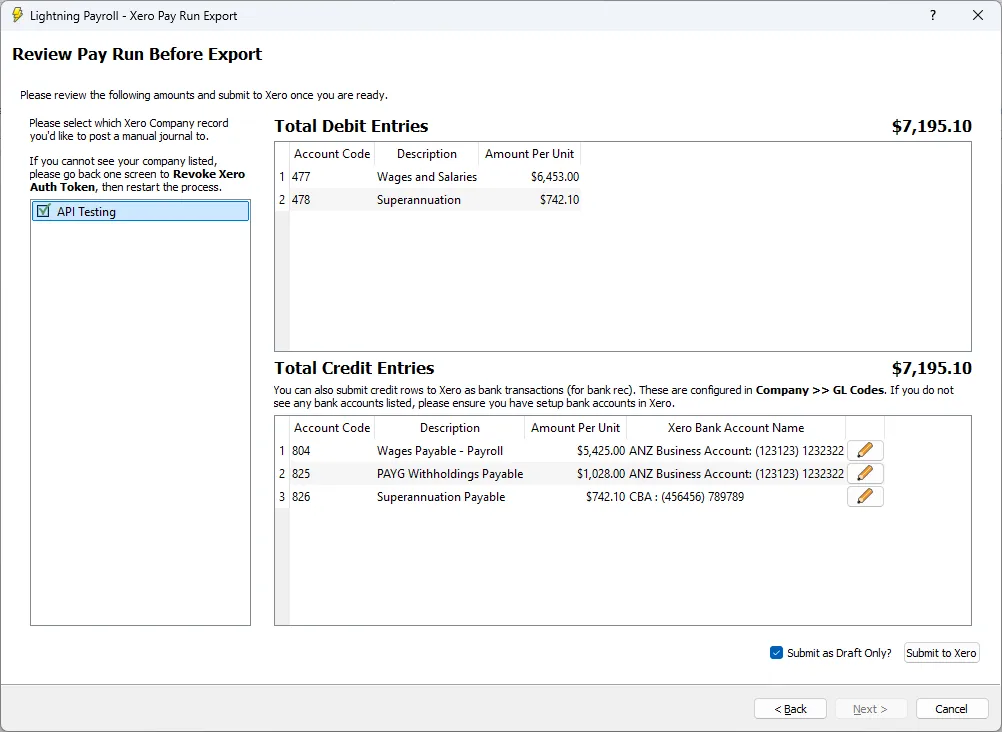
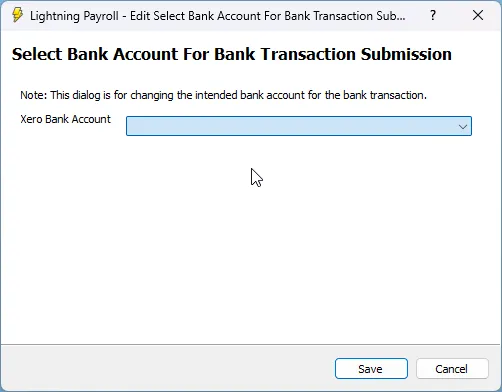
On the Xero Submission Review screen, matched bank accounts will appear beside each credit entry in the credit table. If needed, you can change the bank account on this screen by clicking the account dropdown.
If a GL code has been marked to send to bank transactions, but no corresponding Xero bank account is available or matched, you will see an error and submission will be blocked until resolved.
Always ensure your GL credit entries are correctly configured and that your Lightning Payroll and Xero bank accounts are aligned to avoid submission issues when including bank transactions.

