Answer
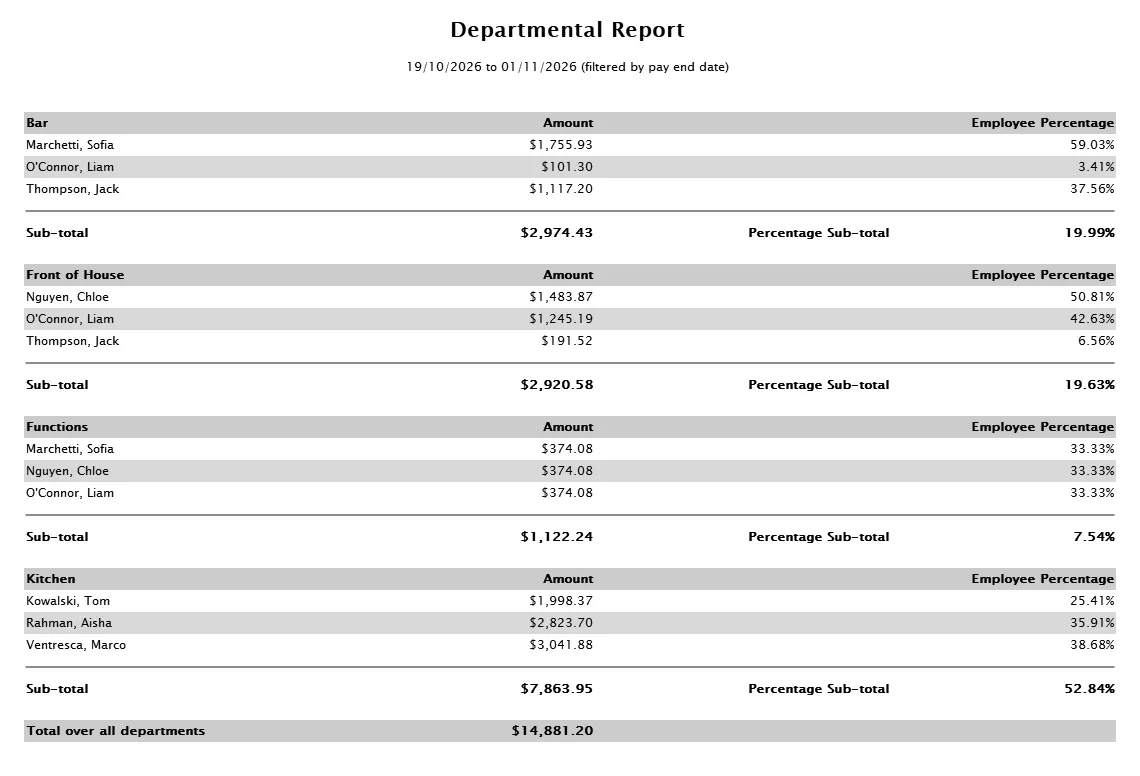
The Departmental Analysis report shows pay totals for a chosen date range, broken down by department. Departments must be set up and employees assigned to them before the report will show meaningful data. See How Do I Setup Departments? for instructions.
If your company uses Advanced Departmental Options in the desktop app, the report shows the split built from the department tags on shifts, pay rates, allowances and bonuses. When part of a pay has no department, that part is included in Total over all departments but not in any department section, so the sections can add up to less than the total. To keep them adding up, give every shift and pay rate a Department, or keep a department percentage on employees whose costs cannot all be tagged. See How Do Department Tags Appear In Reports And GL Postings?
In the Desktop App
- Click Reports in the main navigation.
- Under the Pay section, click Departmental Analysis.
- Set the Start Date and End Date for the report.
- Tick Include Super? (AU) or Include KiwiSaver (Employer)? (NZ) if you want employer superannuation or KiwiSaver contributions included in the totals.
- Tick Use Processed Date? if you want pays filtered by the date they were processed rather than the pay end date.
- Click OK to generate the report.
In the Online (Web/Mobile) App
- Go to Reports in the main navigation.
- Under the Pay category, select Departmental Report.
- Set the Start Date and End Date.
- Toggle Include Super? on if you want superannuation or KiwiSaver employer contributions included.
- Toggle Use Processed Date? on if you want pays filtered by processed date rather than pay end date.
- Click Generate Report. The report opens as a PDF preview.
Once the report is generated you can Download PDF, Export CSV, or Email Report to send the report as a PDF attachment to one or more email addresses.
This is an example of the report for two weekly pay runs, with super included. Each department lists its employees, their amounts and each department's share of the total.