Answer
Lightning Payroll includes a web synchronisation feature that keeps your data in step between your Lightning Payroll installations and the web application. (Before setting this up, we strongly recommend making sure every device holds the same, up-to-date data by using the Online Backups feature, or Create Backup / Restore Backup under the Tools menu.)
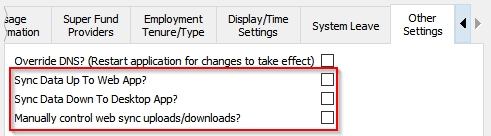
To turn web synchronisation on, go to Settings >> Other Settings in the desktop program. You will see three options:
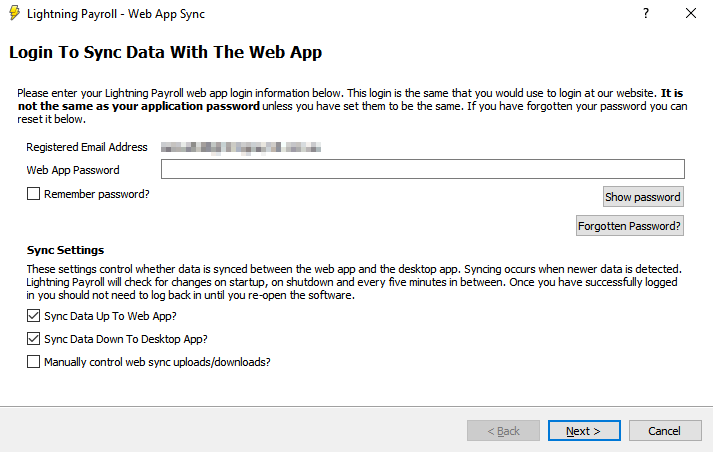
After ticking any one of these options you are asked to log in to enable the feature. Use the same login details you use for the website's Client Login. Note: this is separate from your application password, your subscription ID and your Online Backups password. If you have trouble with your password on this screen, use the Forgotten Password? option below the fields.
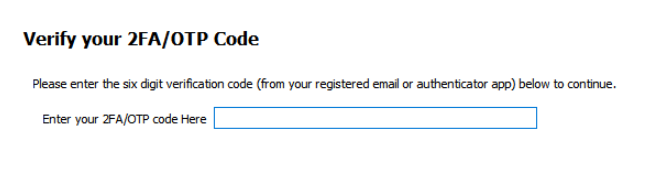
After logging in, you are emailed a 6-digit two-factor authentication (2FA) code to enter on the next screen. If your account is secured with Google Authenticator, use the 2FA code generated by that app instead.
Once the code is accepted, web sync is active.
Sync Data Up To Web App?
When enabled, this detects changes you make inside Lightning Payroll and uploads them to the web application.
Sync Data Down To Desktop App?
This detects more recent changes made online and downloads and restores them into your Lightning Payroll desktop application.
With these first two options, checks run automatically every 5 minutes, and a refresh button appears at the bottom-right of the program. Use that button to check manually in between the 5-minute intervals.

Manually Control Web Sync Uploads/Downloads?
This option does not synchronise automatically, leaving you in control of when backups are created and restored. Instead of the refresh button used by the previous two options, separate upload and download buttons appear at the bottom-right.

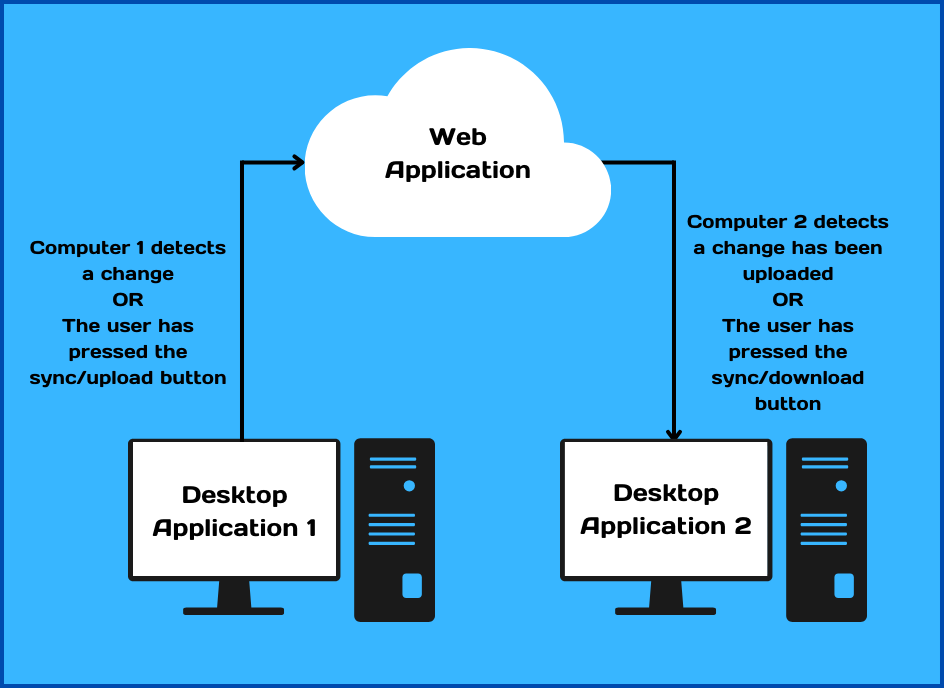
The diagrams below show how the feature works between the web application and one installation, and between the web application and two installations: